Delivery, Moving and Handling
Mainland UK Deliveries
Active Birth Pools delivered within the mainland UK are wrapped in protective packaging and placed in double walled boxes with corrugated sides.
The pools are delivered by our dedicated carrier on a week commencing basis.
If you require delivery on a specific date or at a specific time please contact us for a quote.
Box Size and Weight
- Active Birth Pool: 1880 x 1690 x 790mm 100 kg
- Venus Birth Pool: 1960 x 1390 x 790mm 90 kg
- Princess Birth Pool: 1640 x 1140 x 790mm 80 kg
The carrier will deliver your birth pool to the receipt and distribution point.
You’ll be responsible for moving it to the room where it will be installed.
The pool should be moved from the delivery point in its cardboard box by turning it gently on its side onto a movers dolly or two.
This will enable it to be easily moved along corridors and through doorways. Once the pool is in the room where it will be installed carefully open the cardboard box and remove the protective packaging.

Outside Mainland UK and International Deliveries
Active Birth Pools that are delivered outside the mainland UK are wrapped in protective packaging and placed in timber framed crates with plywood sides that conform to ISPM15 and are stamped accordingly.
Crate Size and Weight
- Active II Water Birth Pool: 2050 x 1810 x 970mm 220kg
- Active 360 Water Birth Pool: 2050 x 1810 x 970mm 220kg
- Active 360 Water Birth Pool with Water Column2050 x 1810 x 970 240kg
- Venus II Water Birth Pool: 2050 x 1420 x 890mm 205kg
- Venus 360 Water Birth Pool: 2050 x 1420 x 890mm 205kg
- Venus 360 Water Birth Pool with Water Column: 2120 x 1450 x 950 205kg
- Princess II Water Birth Pool: 1670 x 1170 x 890mm 145 kg
- Princess 360 Water Birth Pool: 1670 x 1170 x 890mm 145 kg
- Princess 360 Water Birth Pool with Water Column: 1710 x 1170 x 890 165 kg
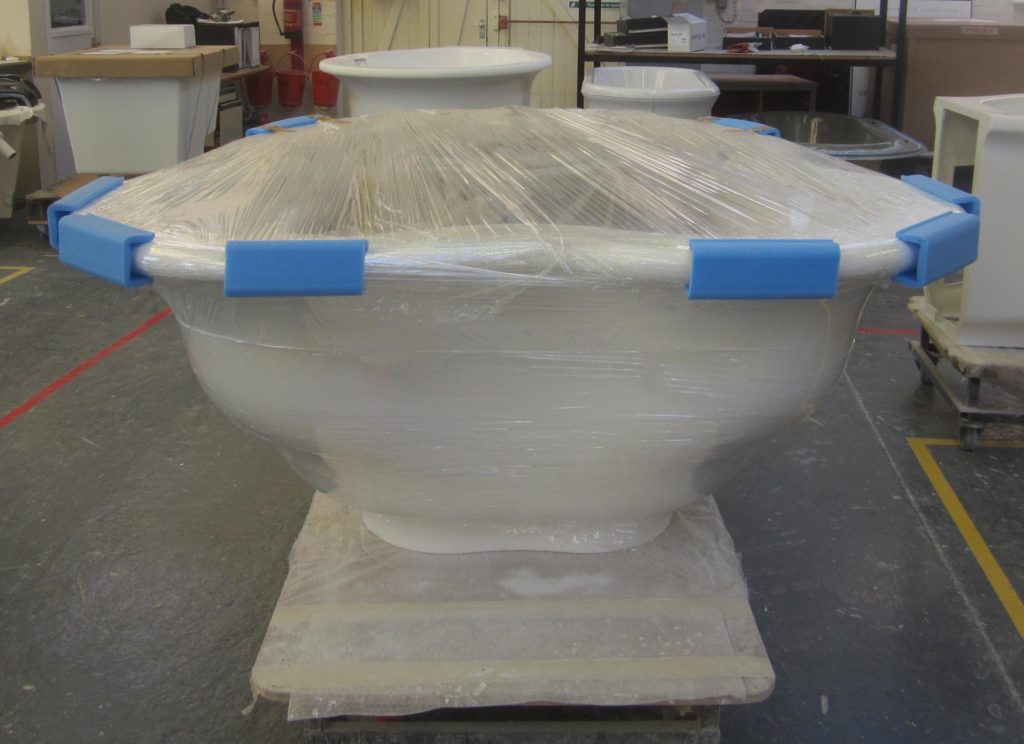
The birth pool should be unpacked from the timber crate but left in its protective packaging for moving from the delivery point to the room where it will be installed.
The pool should be gently turned on its side onto a padded movers dolly or two to enable it to be easily moved along corridors and through doorways. It’s best to handle the pool by the rim as this is the strongest point.
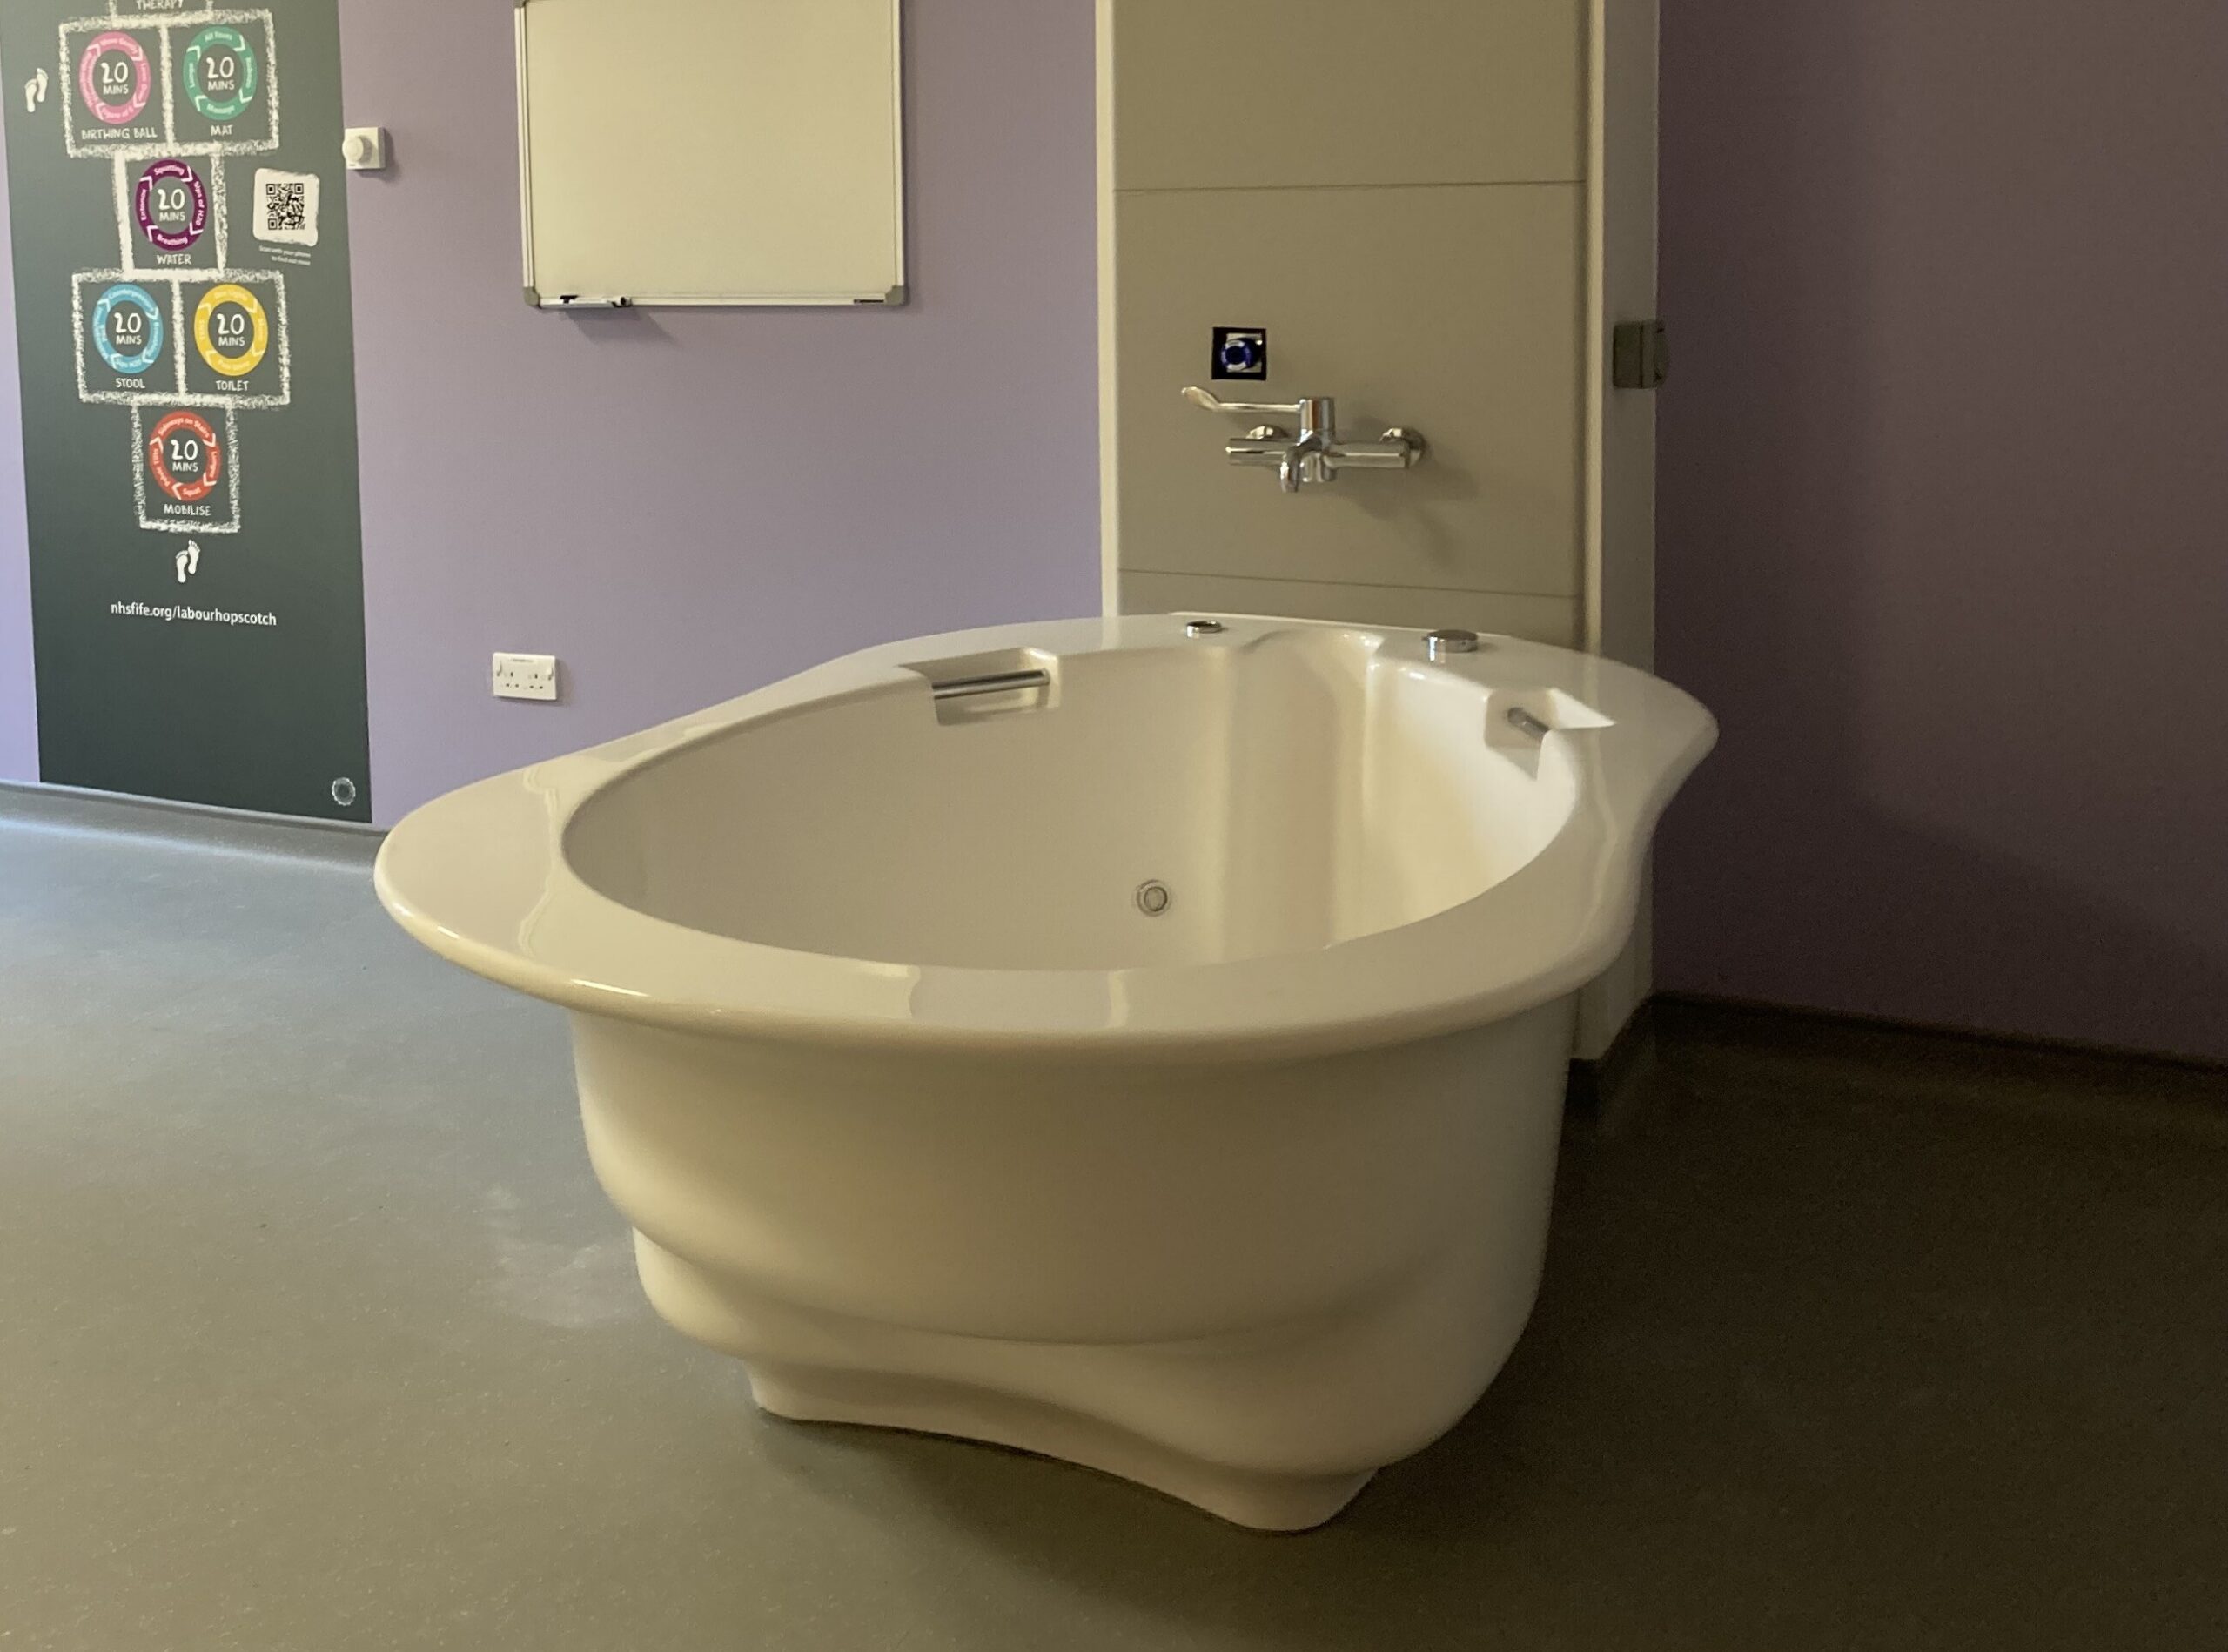
Installation
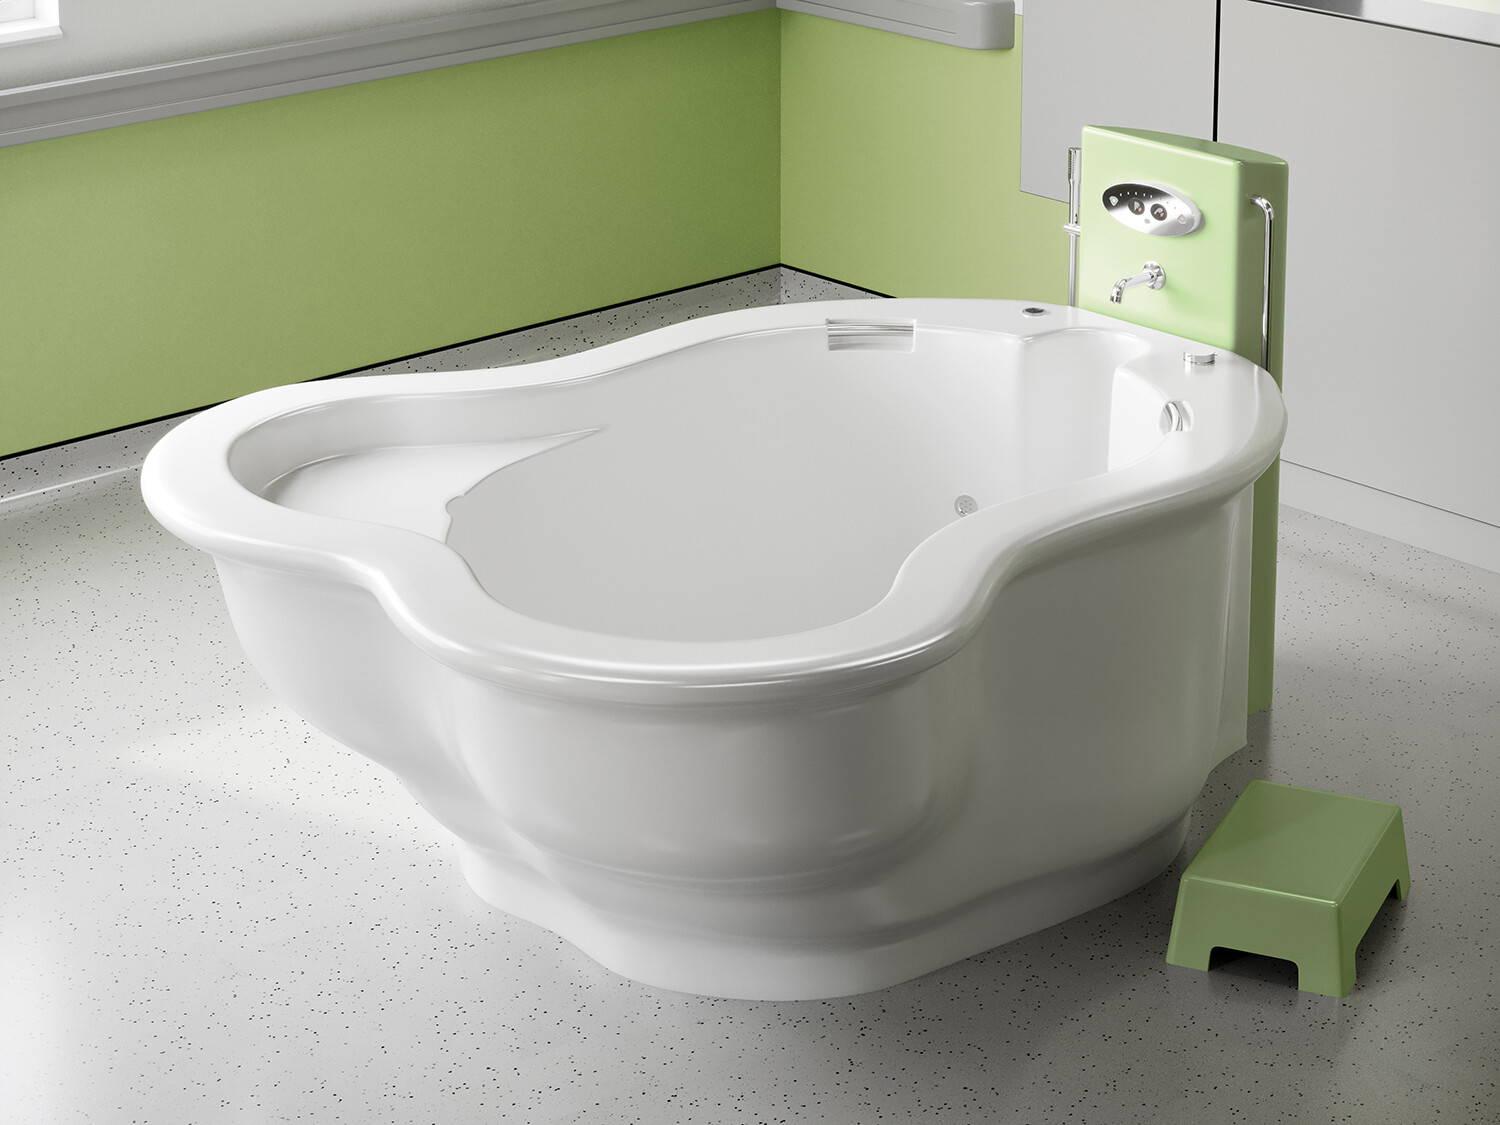
When siting the water birth pool be sure to leave plenty of room around it (at least 80cm on the sides and 150-200cm in front) for midwives and attendants to move freely.
Prior to moving the birth pool into position against the wall the plumbing (taps and drainage) and electrical services should be in place ready for final connection to the pool.
Taps
Fix a 3/4″ thermostatically controlled mixer tap with a short spout on an IPS panel 25 cm above the rim of the pool (rim height 75cm).
We suggest that you consider the Rada T3 or similar as it is a digital tap that not only enables you to programme the water temperature but also the fill time.
A filling time of 20 – 25 minutes is acceptable.
Note: if you are utilising a bath/shower mixer or handheld shower be sure that the shower hose does not dangle in the pool as this is a significant infection control risk
Drainage
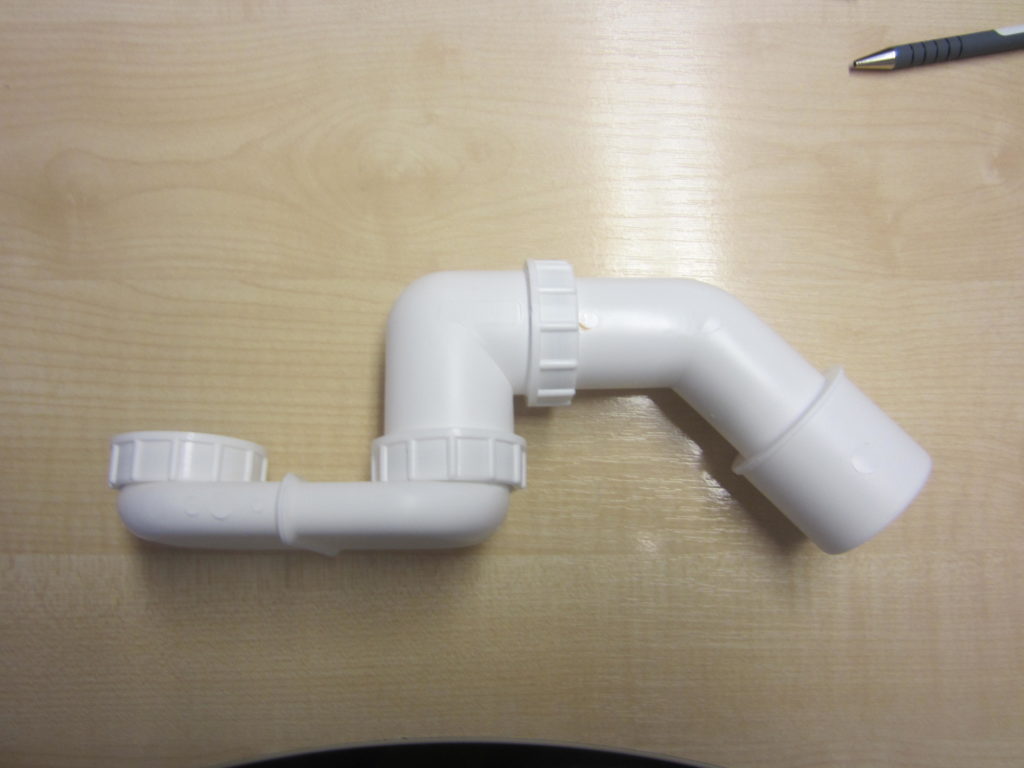
The pool is supplied with a bespoke 40mm pop up waste that is operated by a control that is fixed to the rim.
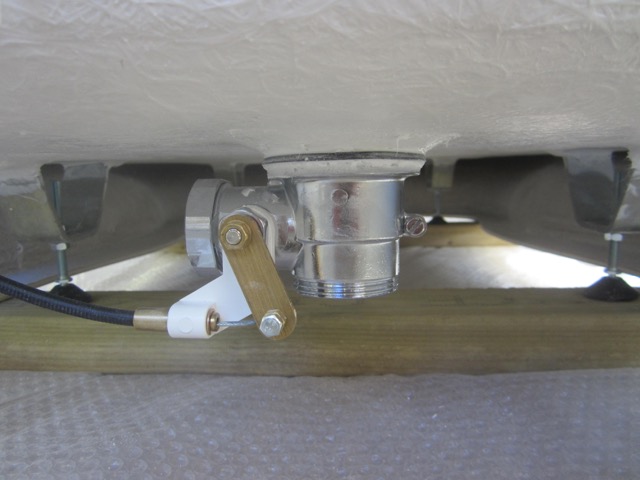
The waste is connected to a P Trap and a McAlpine T25 adaptor
Height from the floor to the centre of the T25 adaptor is 11cm
From the T25 adaptor you can utilise of a wide variety of commonly available parts to connect to the pipework of the buildings drainage system.
When electrical and plumbing services are in place and ready for the final connection to the pool’s systems the pool should be moved into position and fixed to the floor.
Final connection of services can be carried out through the access panel when the pool is secured in place.
Fixing the birth pool to the floor
All feet MUST be in solid contact with the floor.
If the floor is not level or smooth be sure to adjust the feet or level the floor so that all of the feet are in firm contact with the floor and there is no rocking or movement.
The bottom flange of the outer panel should be in contact with the floor but is not the primary support structure of the pool and must not bear the full weight of the filled birth pool.
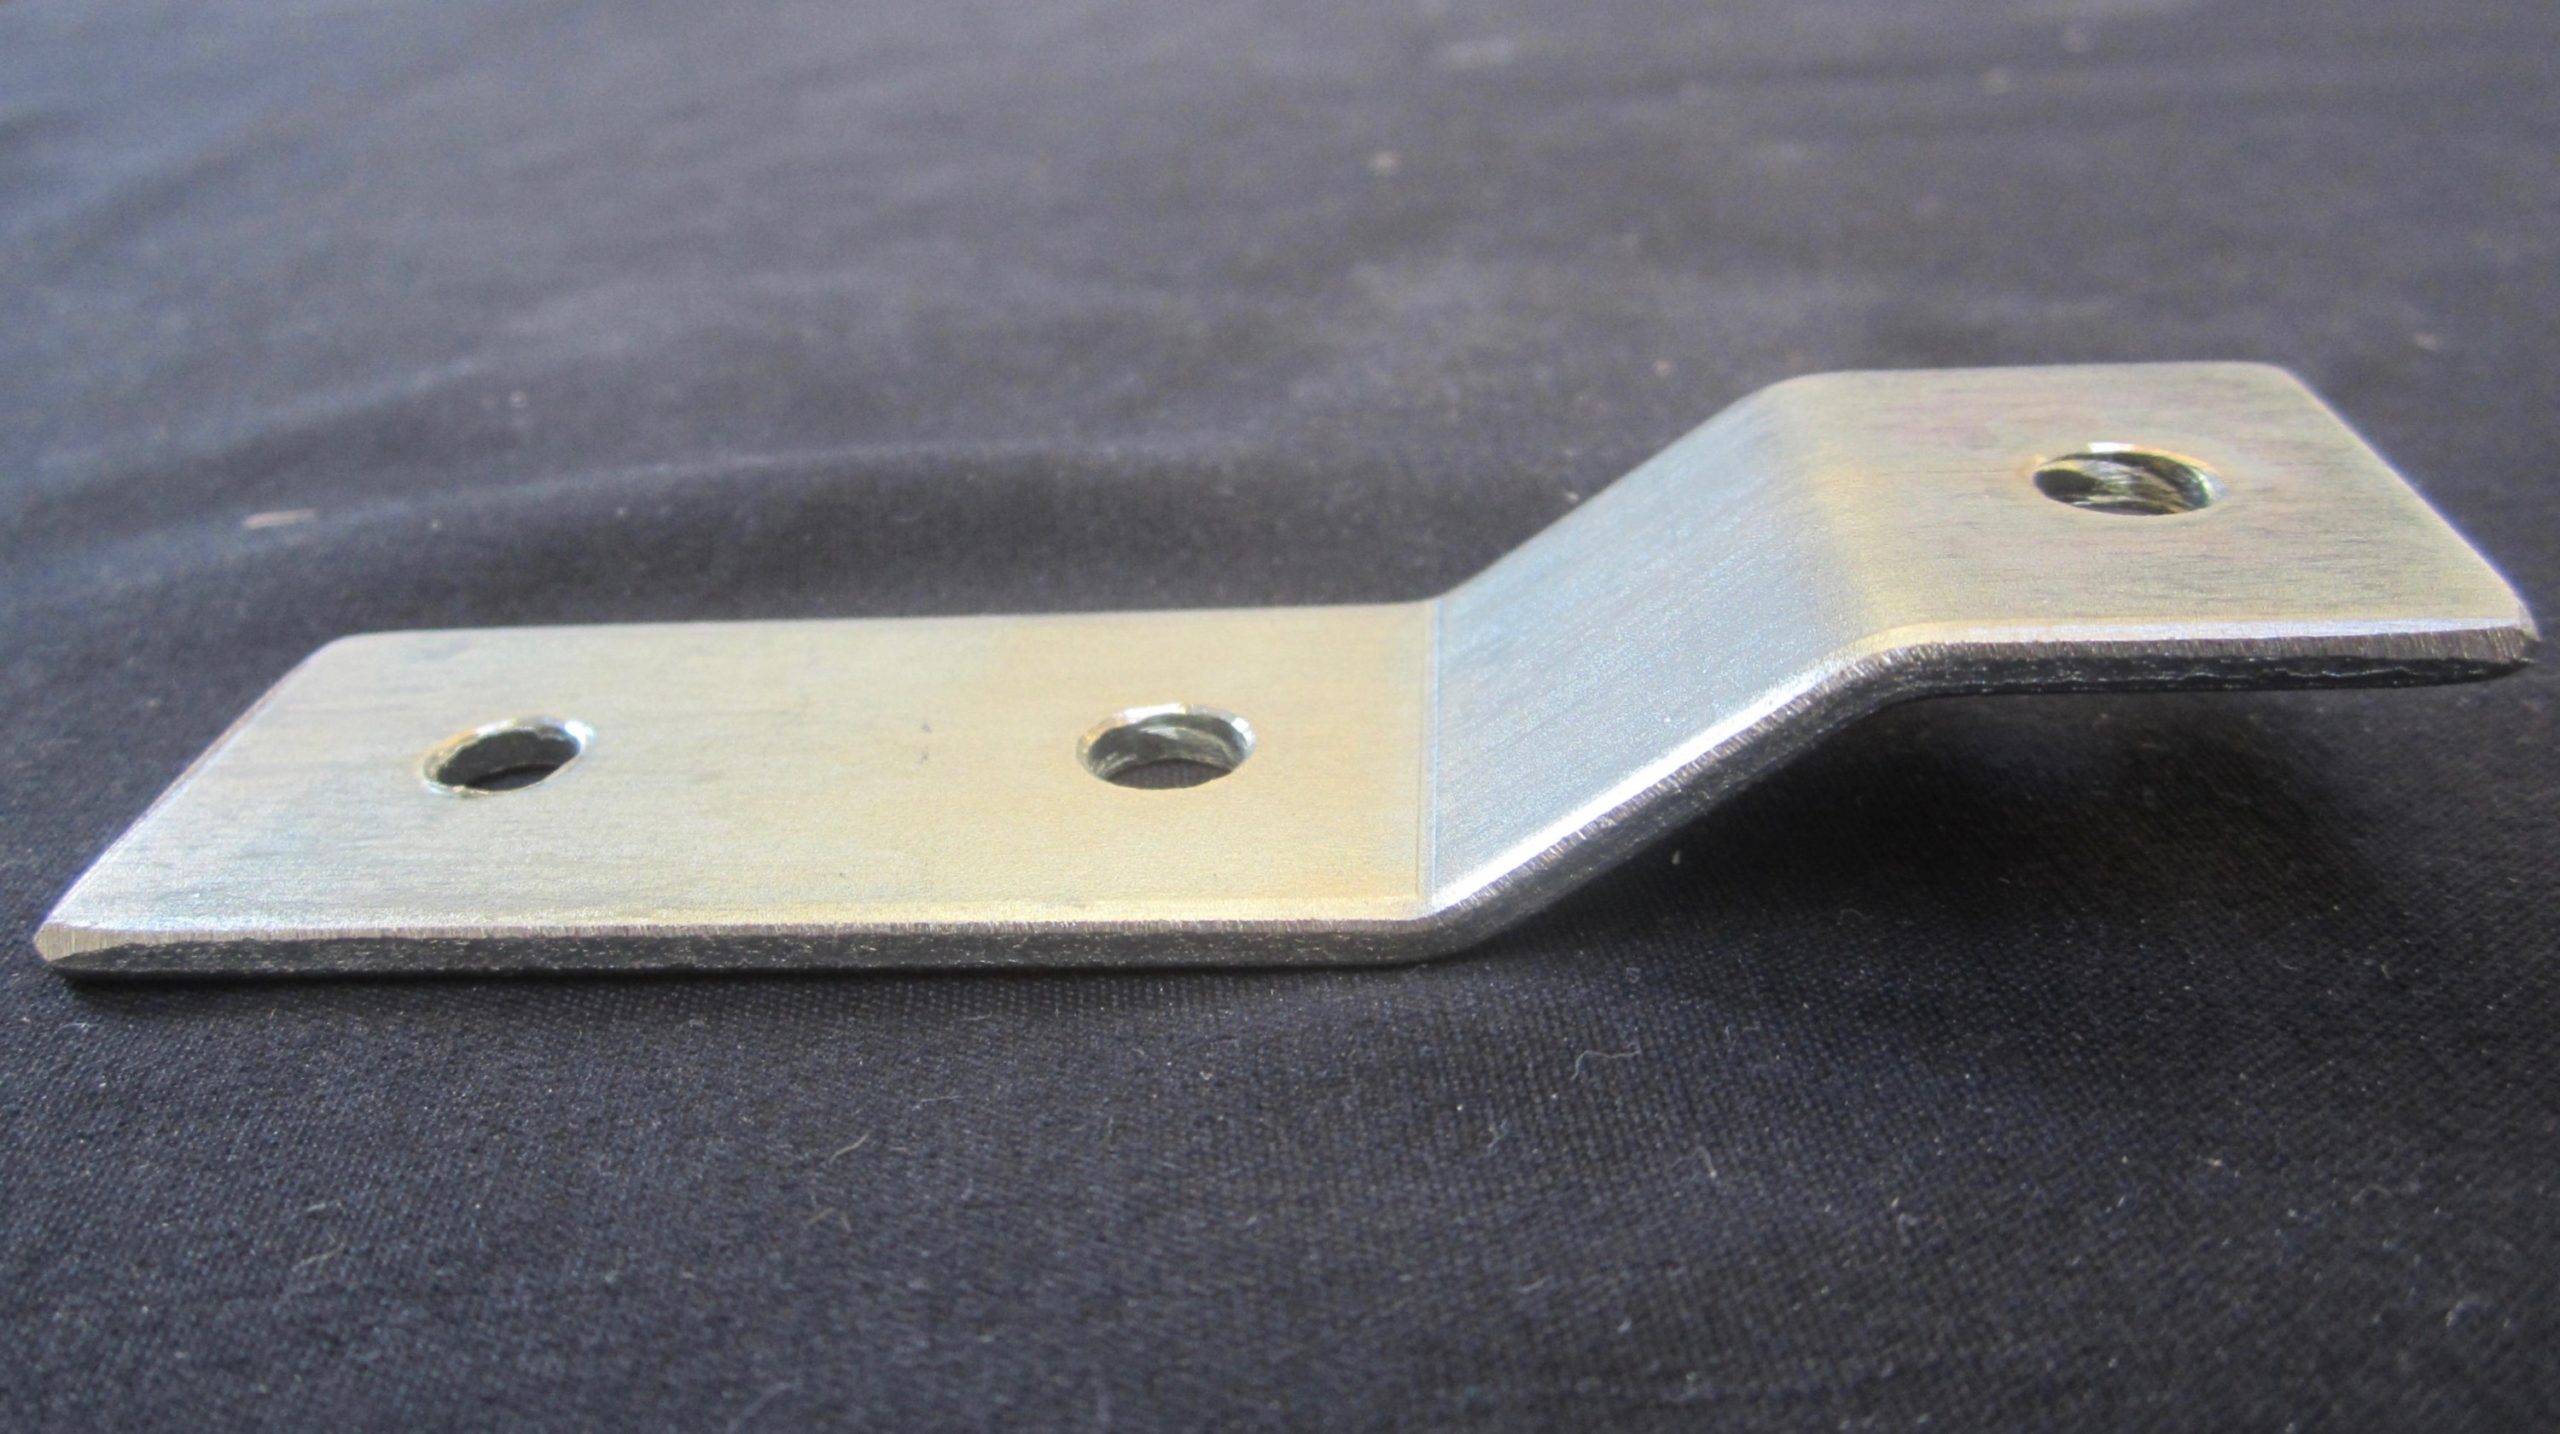
The water birth pool is supplied with 3 x 100 mm x 30 mm fixing brackets.
You’ll find the brackets taped to the pool just inside the access panel that can be opened with a 10mm Allen Key.
It is essential these brackets are securely fixed to the floor with suitable hardware to immobilise the pool and prevent it from moving when empty.
Failure to secure the pool to the floor with the fixing brackets will endanger the end user and VOID the guarantee.
Locating and fixing the brackets
Step 1: All Models:
Mark the central position of the water birth pool on the wall that it is being fitted on.
SStep 2: Active II Water Birth Pool – front fixing bracket
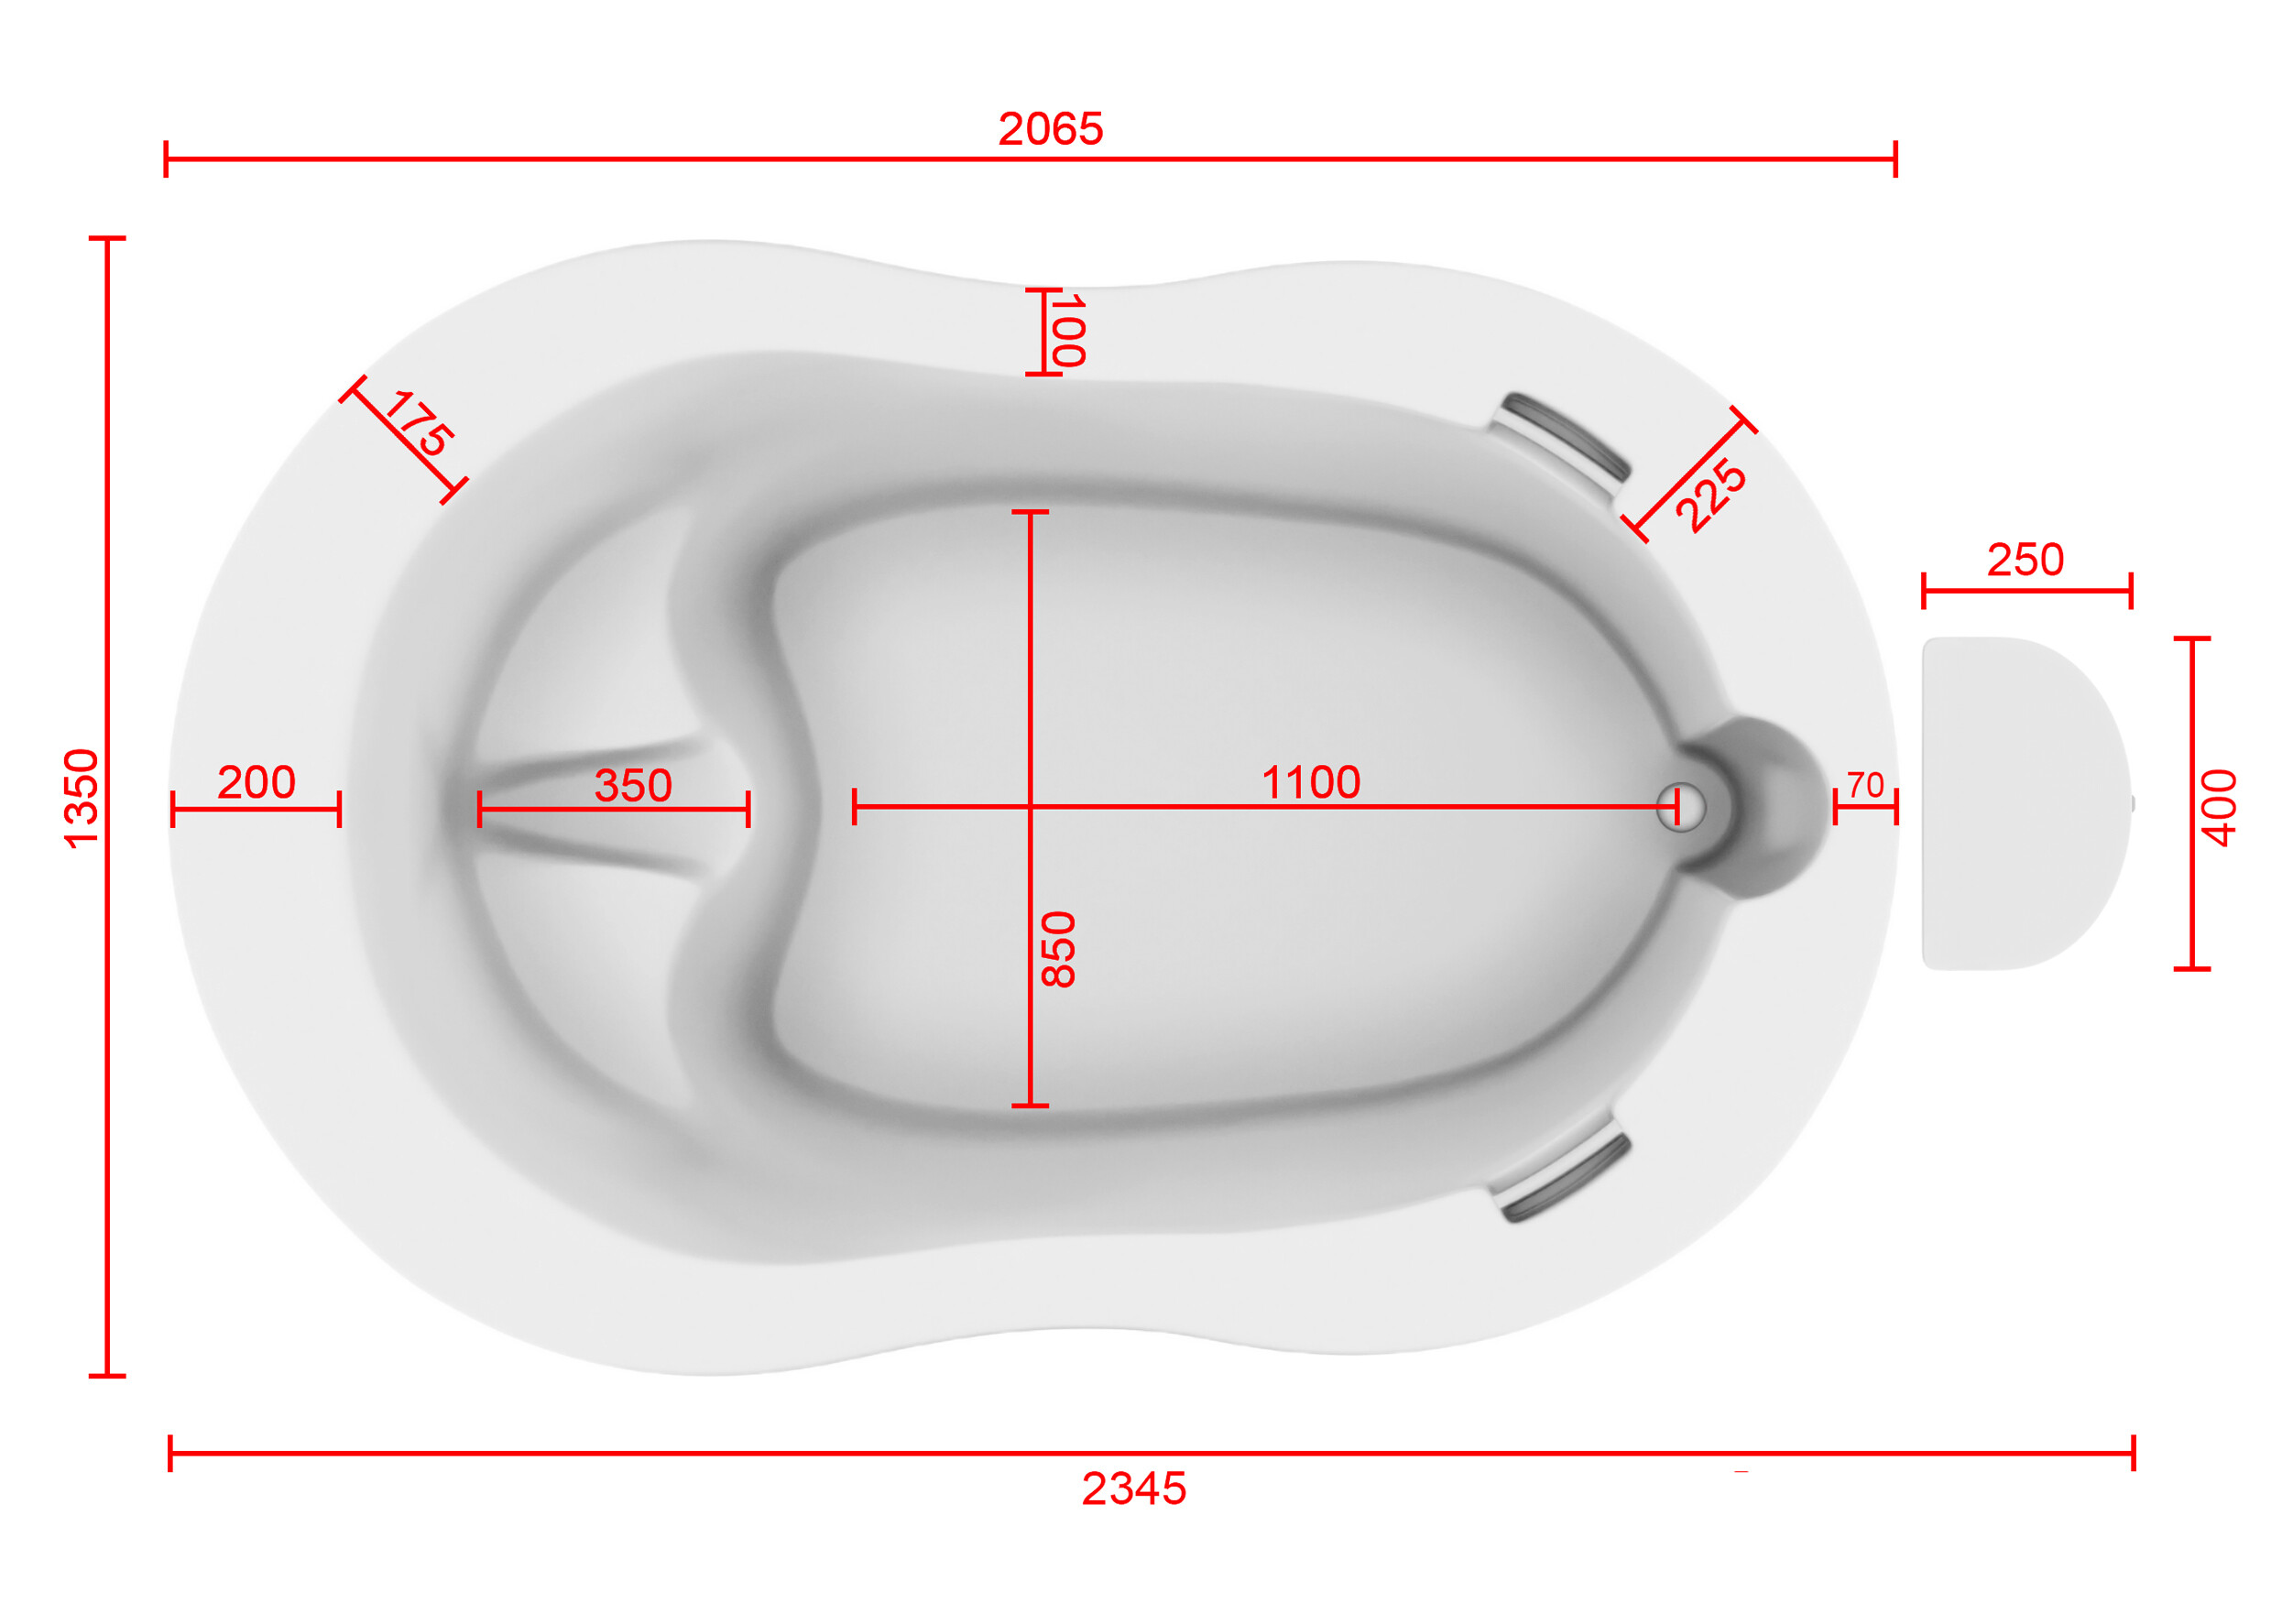
Measure 1330 mm from the centre point on the wall and mark this as the point to locate the bracket so that the long flat piece is projecting away from the wall and the raised short section faces forward into the room.
Fix the bracket to the floor using suitable hardware.

Front bracket right centre – Back bracket lower left and right
Step 2: Venus II Water Birth Pool
– front fixing bracket
Measure 1330 mm from the centre point on the wall and mark this as the point to locate the bracket so that the long flat piece is projecting away from the wall and the raised short section faces forward into the room.
Fix the bracket to the floor using suitable hardware.
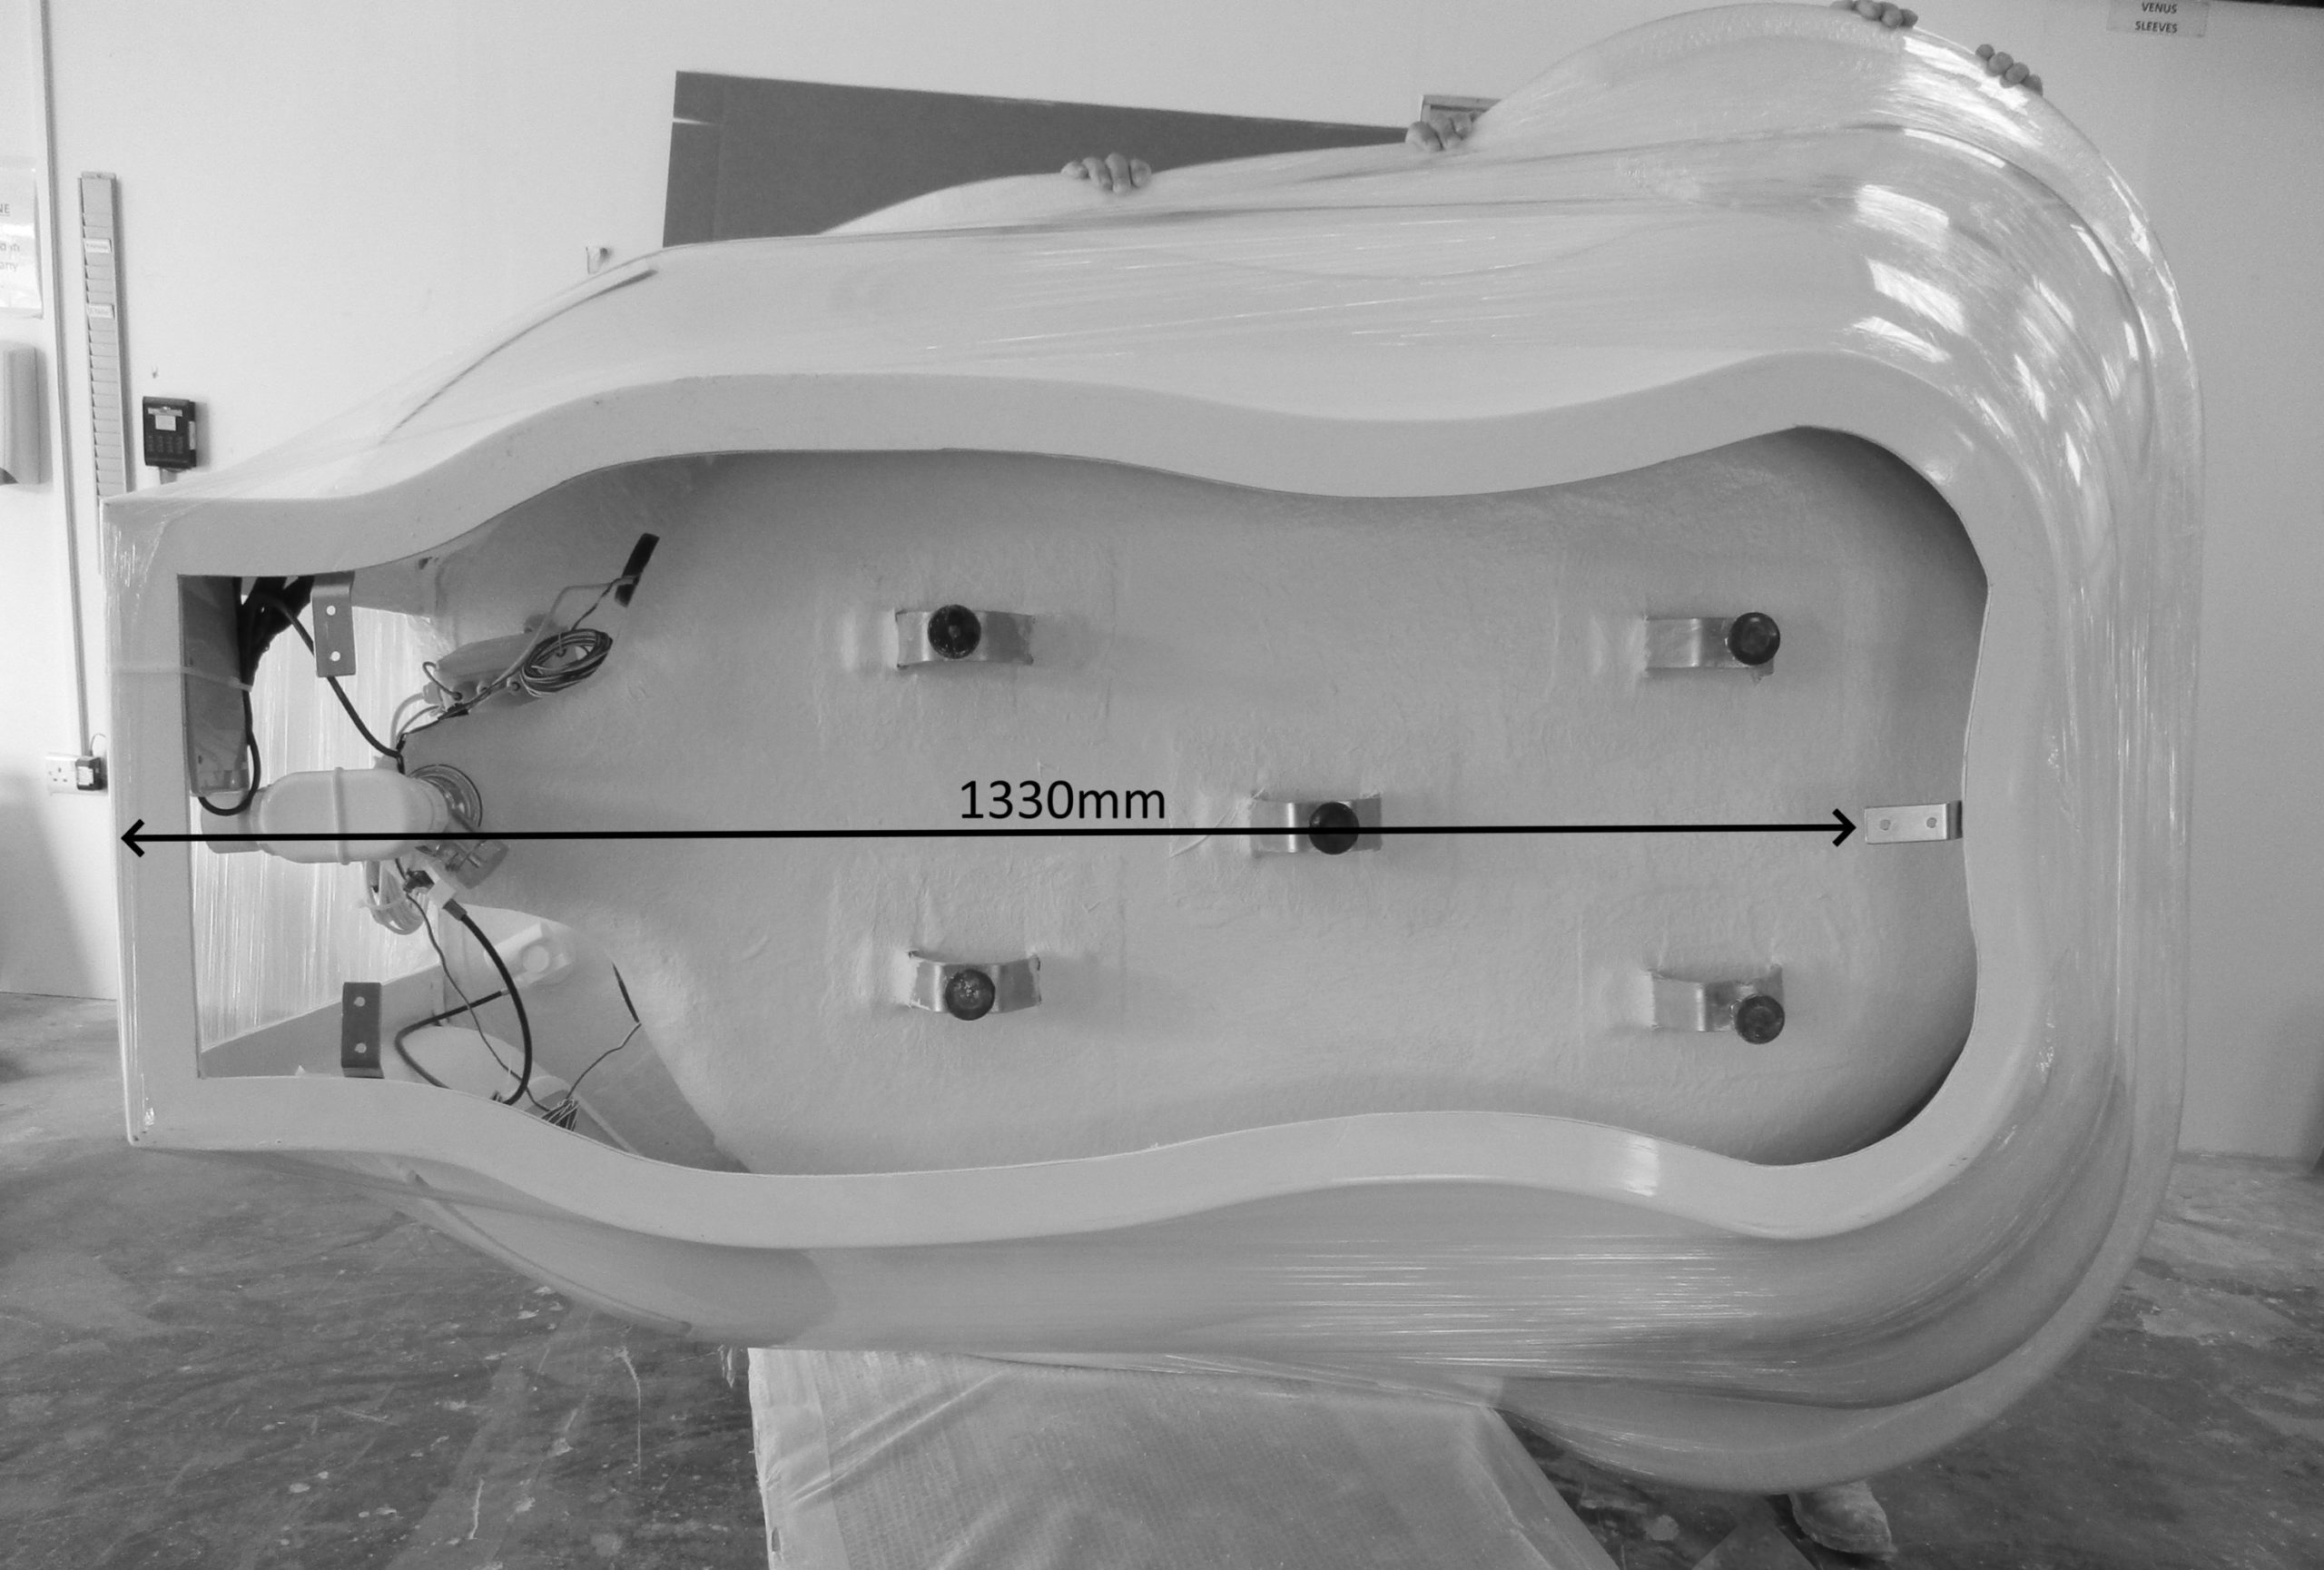
Front bracket right centre – Back bracket lower left and rightt
Step 2: Princess II Water Birth Pool – front fixing bracket
Measure 1020 mm from the centre point on the wall and mark this as the point to locate the bracket so that the long flat piece is projecting away from the wall and raised short section faces forward into the room.
Fix the bracket to the floor using suitable hardware.
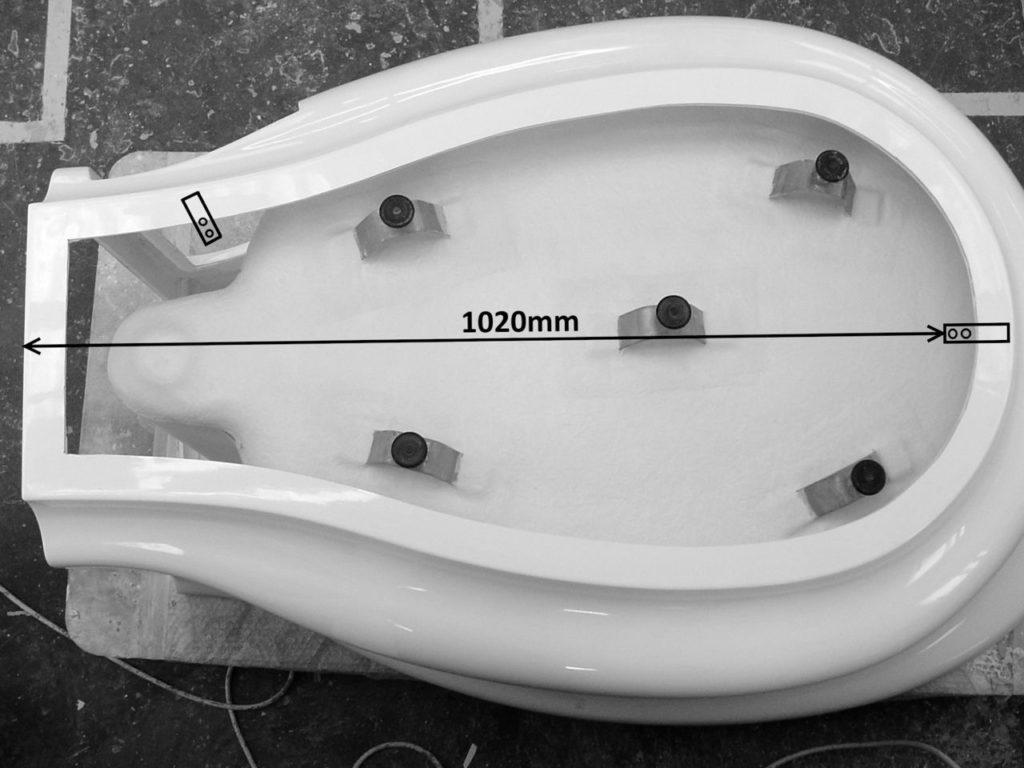
Front bracket right centre – Back bracket upper left
Step 3: All Models
Place the birth pool at least 60 mm away from the rear wall before moving it onto the bracket and flush against the wall.
Push the birth pool towards the wall so that the flange of the pool slides under the bracket.
This secures the front of the pool to the floor.
Step 4: All Models – back fixing bracket
The 2nd fixing bracket should be fixed in position on the bottom flange of the pool below the access panel as indicated in the images above.
You will see that a hole has been drilled in the flange. Line the bracket up with this hole. You can fix the pool to the floor with a raw plug and suitable hardware to guarantee that it is secure.
The long flat piece should be fixed to the floor with suitable hardware so that the short section is holding the flange securely to the floor.
Step 5: All Models
Seal the water birth pool to the floor and wall using a suitable sealant to prevent ingress of water and dirt.

Installation 360 Models
Place the water birth pool in the exact location and orientation that you want it.
Mark the floor at the centre of the curve at the front of the pool.
Move the pool away.
Measure 6cm away from the mark you made and fix the front bracket in place.
Continue by following instructions above.
Water Column Installation
Fixing the column to the floor
- Remove the access panel using a hex key and place it off to one side
- Locate the water column in the centre of the pool at least 25mm away from the back rim
- Mark the four anchor points on the floor and take the column away
- Drill four holes suitable for the hardware you will be using to anchor the pool to the floor. We recommend expansion bolts or similar fixings.
- If you are using expansion bolts place them in the holes and align the water column accordingly.
- Before tightening the bolts apply a generous amount of silicone to the underside of the flange.
- Tighten the bolts fully.
Fixtures and Fittings
The Water Column is designed to accept a variety of plumbing fixtures and associated fittings such as hand rails.
Installers will find that there is plenty of room inside to accommodate valves and pipework.
The front and sides of the column have been reinforced with 18mm thick plywood.
Ficore is an extremely hard material that is easy to drill provided you place strip of masking tape on the surface and use an HSS drill bit or wood hole saw to make the hole.
We suggest that you use a 120mm spout and fix it to the column at least 150mm above the rim of the pool.
The tap can be fixed above the spout as shown in the image above.
Handrails and/or handheld showers can be fixed to the sides of the column on the flat sections.
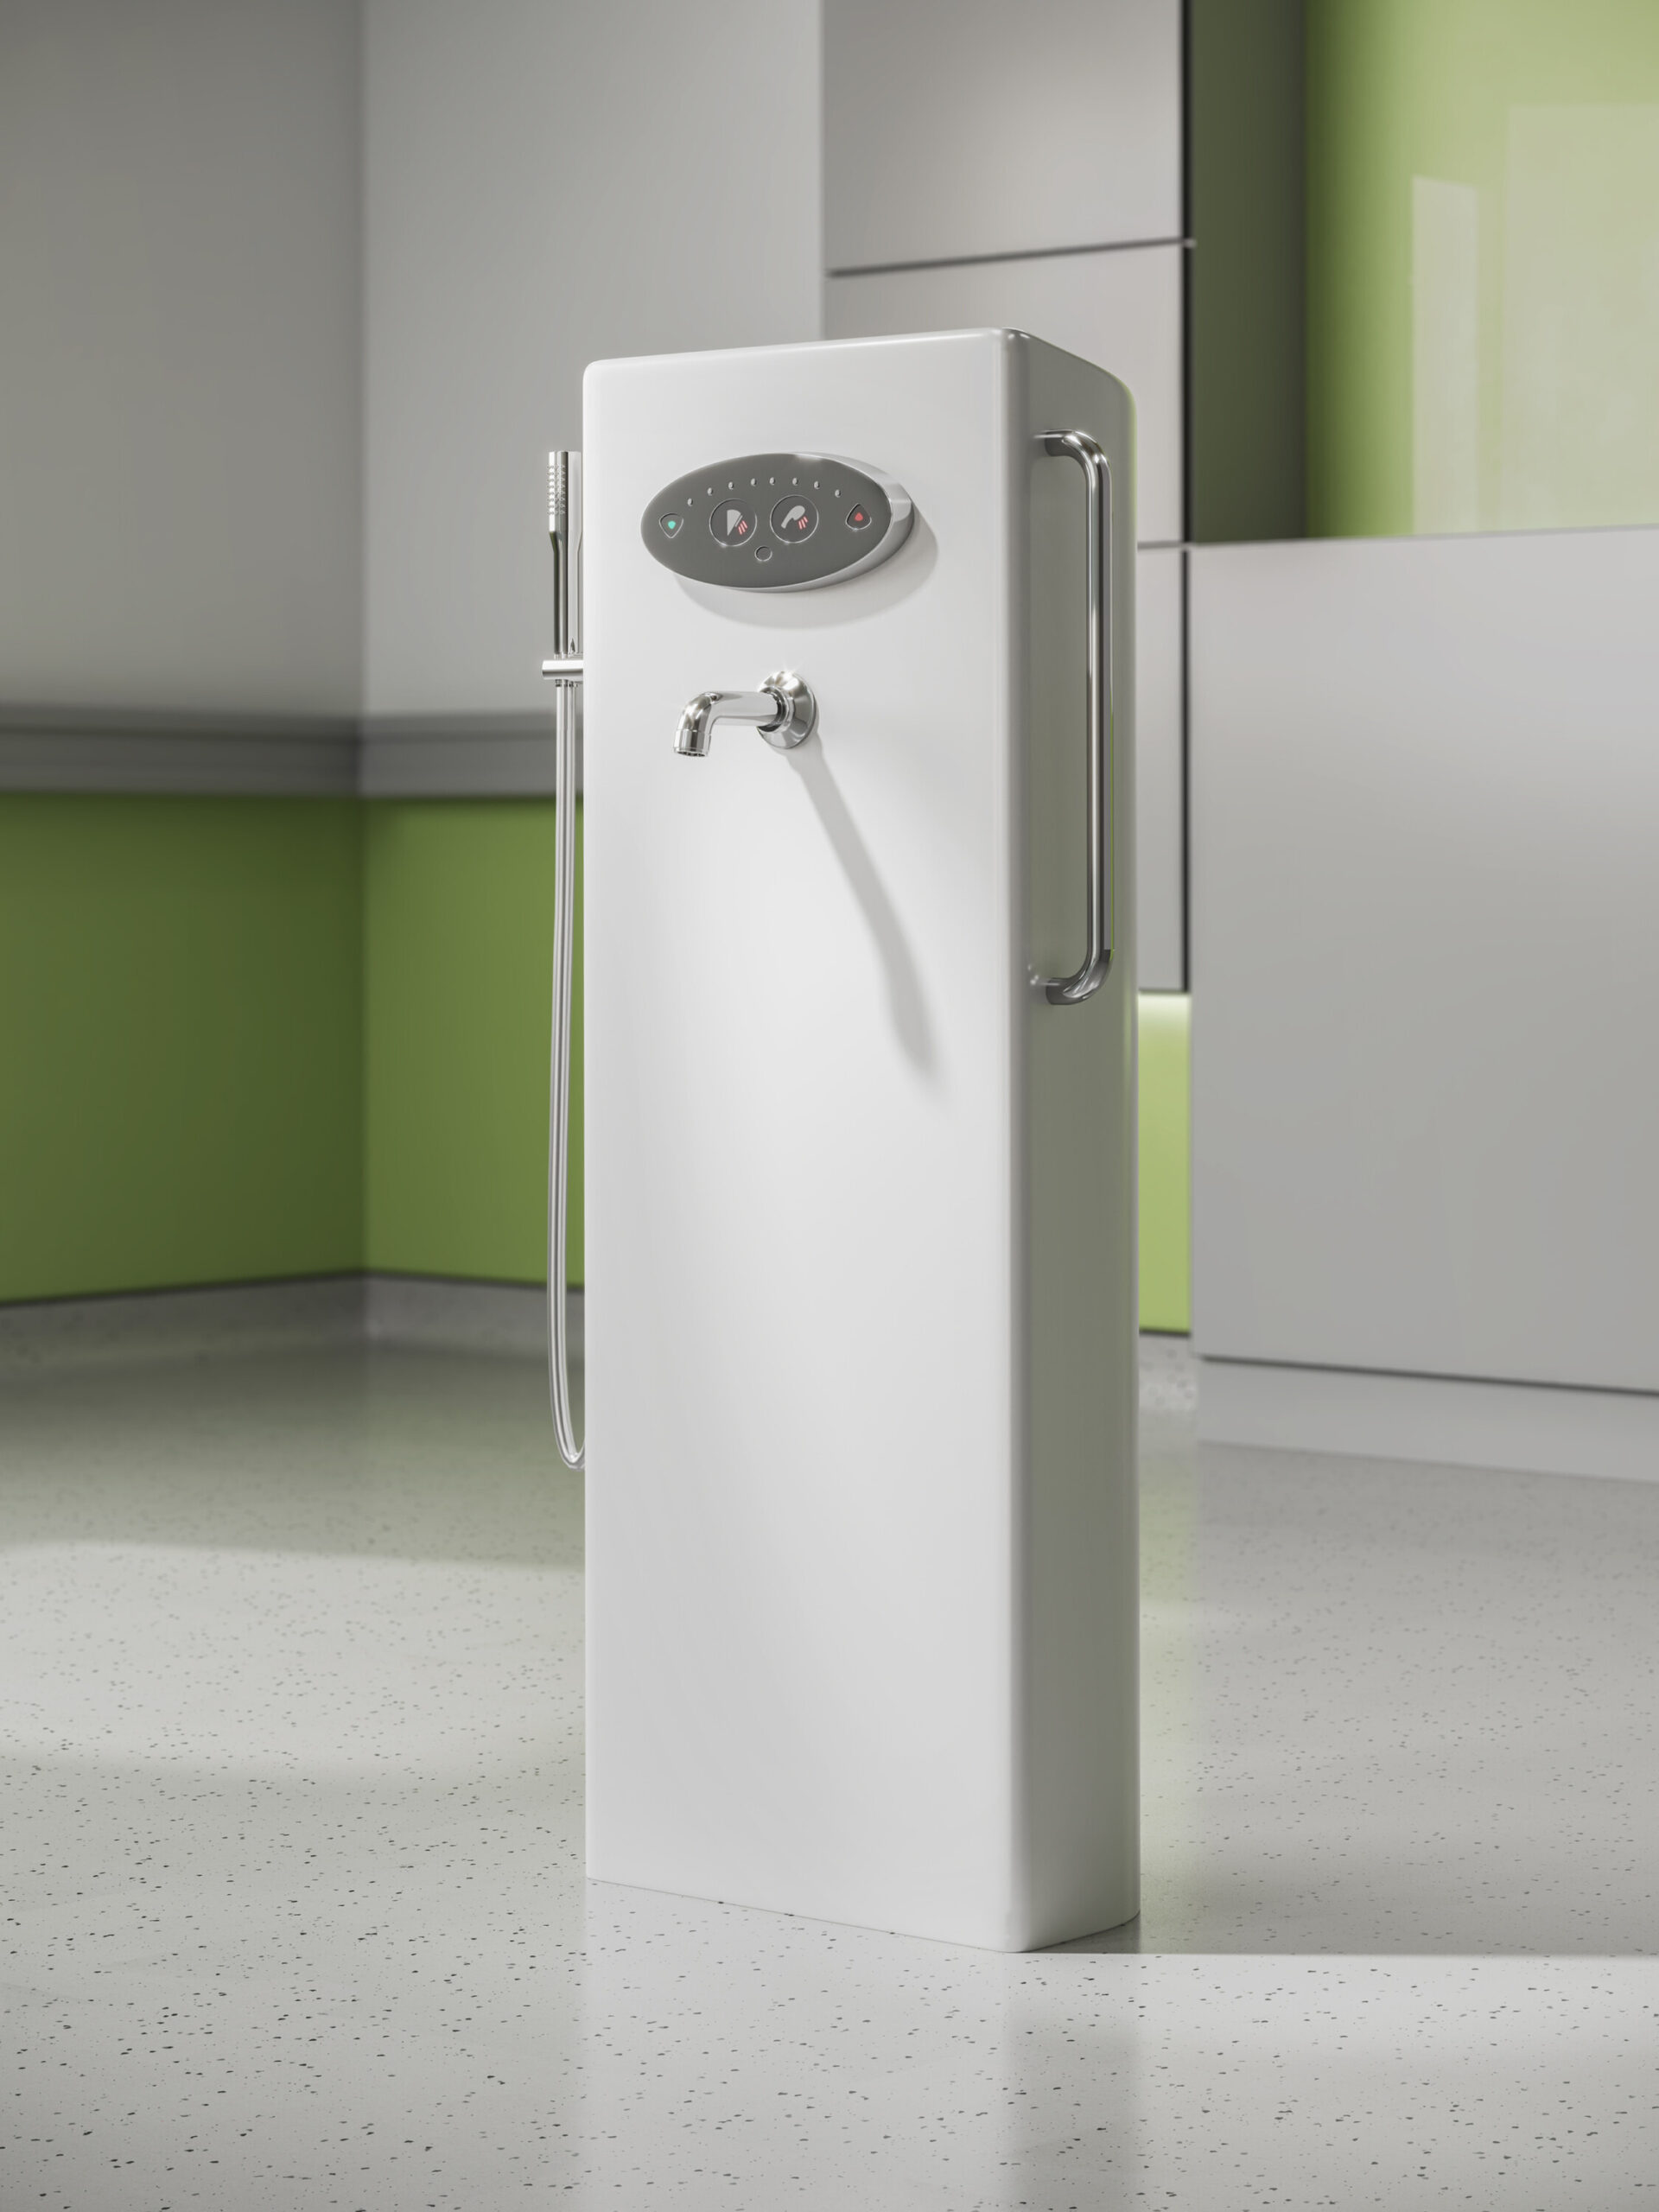


Tap shown is a Rada Sense Bath/Shower T3 DMV
Multi-Colour LED Lighting
Installation
Connect the light to a circuit breaker, then to the power supply.
The system should be protected by a 6 AMP RCD with 30 -32 MA Sensitivity.
The LED is transformed down to 12 volts and has a power rating of 2.5 watts.
A separate means of Isolation should be provided for future maintenance.
Operating voltage 220/230 volts – 50/60 hertz
Operating instructions
The system is operated by the control pad on the rim of the pool.
To activate the system press the button once.
The white light will come on.
To choose another colour continue to press the button and the system will cycle through the range of colours – light blue, blue, purple, magenta, red, pink, orange, yellow, apple green and green.
To turn the system off press and hold the button down for 2 seconds.
The light should be switched off when the pool is not in use.
Bluetooth Sound System
Connect the factory fitted bluetooth sound system to a circuit breaker and then to the power supply.
The system is always on standby waiting for users to pair and connect.
It’s operated directly from the users mobile phone or bluetooth enabled device and has no controls of its own.
N.B. If there is more than one birth pool with bluetooth sound being installed in the same unit you will need to fit a remote switch to enable the users to turn the system on and off.
This is to prevent people accidentally activating the system instead of the one in their room.
Transducer speaker
- Frequency Range 20Hz-20KHz.
- Maximum Power Output 50W at 4 Ohm.
Bluetooth Amplifier
- Transmission Range 5m to 10m.
- Maximum Power Output 2ch X 20W.
- Operating voltage 220/230 volts – 50/60 hertz
- Transformed Voltage 12 Volt DC / 3 amp.
- Waterproof Rating IP67.
Cleaning and Care:
Safety comes 1st!
Active Birth Pools are Rated No.1 for water safety and infection control standards.
This is because the material we use (Ficore) is 5 x harder than other materials and is immune to the effects of disinfection with 10,000ppm hypo-chlorite.
Seamless one-piece construction and the absence of surface mounted metal work deny micro-organisms the environment they need to propagate.
SaveSave